
Showing posts with label scrapbooking. Show all posts
Showing posts with label scrapbooking. Show all posts
Thursday, December 5, 2013
Holiday Traditions: Let's Get Sketchy December Daily
It's only the first week of December and I'm already getting behind on my December Daily album. But I did complete a few layouts. Here is one I did using a sketch from over at Let's Get Sketchy.
 Some supplies I used: washi tape from We R, sticker from Making Memories, Letter Stickers from Basic Grey, Pen from Uniball, and a chipboard frame and background paper (unknown).


Monday, December 2, 2013
December Daily Advent Calendar

Unfortunately, I forgot to take a picture of the blank box. So just imagine it here.
Here was the next step. I got really lucky and found out my square punch fit the drawers almost exactly! It made it a breeze. Even without, you could use a paper cutter to easily cut out 25 squares. I used an old collection of Basic Grey paper I had, Blitzen collection, and one page of the Dasher collection. Then I used my circle punch to cut out a little spot on each square. I wasn't too picky about placement, as you can see! But I did the whole thing on December 1st, so I didn't stress about making it perfect. I inked the edges of each piece of paper with red ink from an Around the Block inkpad.

After I had that step done, which took several hours, I started to do the numbers and embellishments. I mod-podged everything on. I am not very creative, so at this point I went to Pinterest to find something inspiring. I found the toolbox calendar on this post helpful. I used her method of getting numbers from any source possible. I have tons of letter stickers, so I used number stickers off some of those sheets. I also used chipboard, some little tags I had from getting my car serviced (I never throw anything away, and once in a blue moon, that is a benefit!), cutout from Making Memories paper and 7 gypsies bingo card paper, an ATC from Paper Studios, Smashpads calendar tape, and 7 gypsies ephemera for the numbers. 
Then I added embellishments. Again, I used a lot of stuff I've had for a long time. I didn't buy anything for this project except the box, which was great. I have a big bag of Christmas stuff, and it was nice to use some of it up, and a nice challenge, too. I'm not even sure where some of them came from. But some embellishments I used are:
 word strips from Making Memories (Day 2, 24), We R Memory Keepers washi tape (6, 11), Spare Parts acrylic sticker (Day 20), Love Elsie (22).
 Other: stickers, 3-D stickers, ribbon, bakers twine, tags, punchout snowflakes, copper word accent
The last thing I did was fill the drawers. It was so fun putting it all together. I put little candies in some of the drawers (See's Candy, our favorite), a few pairs of Christmas socks, some little presents like Lego mini figures, and a bunch of paper strips with tasks on them, like donate old toys to charity, sing carols with the family, take Christmas photos, visit Santa, etc.
Sunday, November 24, 2013
Scrappy Sunday: Nearly Naked December Daily, Part 1
This is the first year I've decided to participate in the December Daily project that Ali Edwards (and many others) does every year. I don't do mini albums very well, and I love adding lots of pictures, so I went with 8.5x11, which is about as close to mini as I get.

It was also the first time I used my bind-it-all machine, and as you can see, I am still learning it! I punched a bunch of extra holes, messed up on some of them, etc. I think I had it down by the end, but I already had made my album look all sloppy. But I forged ahead anyway, since I didn't have more chipboard for the covers and I wanted to stick with the paper I'd chosen. So it's going to be a messy project! I wasn't very picky about my paper selection, as you can see. I cut some envelopes in half so they'd fit, but most of the pages are full sized layouts and mats that I bound in for extra photos. I probably should have made sure all the tones matched, but I threw a few extras in there that didn't match very well. I have a lot of family birthdays in December, and I didn't want my paper to be too 'Christmas-y' on those days. So there's some pink pastel pages in there as well as more traditional Christmas paper and distressed looking pages.
I've noticed that most of the December Daily albums I've looked at only go through Christmas, but that's not really daily for all of December, so I continued until New Year's Eve. I will probably leave that page how it is, because I love that paper, and put my pics on the inside of the back cover. If I need more photo space, I can always paste in more envelopes or a waterfall somewhere.
 I haven't done the embellishing yet, so this is probably going to be a 2 or 3 part post. I will post later once I've embellished.


Unfortunately, I'm very slow and unorganized about scrapping, so it took me 6 hours yesterday just to get all my Christmas stuff together, decide what order it went in, make sure I had pages for each day, cut them to size and bind them all.
 |
| First page and ATC by Paper Studio, holly sticker by ? |

It was also the first time I used my bind-it-all machine, and as you can see, I am still learning it! I punched a bunch of extra holes, messed up on some of them, etc. I think I had it down by the end, but I already had made my album look all sloppy. But I forged ahead anyway, since I didn't have more chipboard for the covers and I wanted to stick with the paper I'd chosen. So it's going to be a messy project! I wasn't very picky about my paper selection, as you can see. I cut some envelopes in half so they'd fit, but most of the pages are full sized layouts and mats that I bound in for extra photos. I probably should have made sure all the tones matched, but I threw a few extras in there that didn't match very well. I have a lot of family birthdays in December, and I didn't want my paper to be too 'Christmas-y' on those days. So there's some pink pastel pages in there as well as more traditional Christmas paper and distressed looking pages.
 |
| Added half a silver envelope by DCWV. |


Happy scrapping!
Sunday, November 10, 2013
Scrappy Sunday: Challenge overload! (Don't Fall)
This one is going to have a lot of links…

This was a challenge for Scrap Our Stash this month. The challenge was to use only 6x6 paper pads for the patterned paper (except for the background, of course), and to use at least 6 of one type of embellishment. I used two 6x6 pads and 7 leaves, which I have had in my stash for about 5 years, and I’ve only used maybe 1 or 2 in all that time. I was tempted to throw the whole lot on there, but I stuck to just 7.
I also looked around for a good sketch and found the perfect one at Chic Tags (above)!

I also combined with several other challenges…
All boy challenge
Share & Win Challenge
Saturday, November 2, 2013
Scrappy Sunday: Exploding Box Project

 I have wanted to make one of these since I first saw it months ago. So, I made the cardstock box, but I never did anything with it. I wanted to save it to make for my husband for our anniversary. I saw it on Pinterest, but you really need to check out the tutorial on this website. It is AMAZING, so easy and simple. I followed the directions exactly and it turned out great on the first try.
 I finally had to stop procrastinating and make it a couple days before our anniversary. I used a line of 7 gypsies paper, I think it was called Lille? Anyway, I've had it for a while and I love it so much I don't want to used it, if that makes sense! But once I made the box, it was so gorgeous I didn't want to put pictures on it! I also used 7 gypsies ink for the edges of the patterned paper squares. I just used scissors to round all the corners. I will say, if you make this, be prepared to spend a lot of time on it. It takes just about forever to cut out all the paper to decorate it. I loved it so much I took about a million pictures!
I used a nut I found on the ground one day for the lid pull. It gave it a masculine feel. Even though all the boxes I've seen used a ribbon around the lid, I skipped that, as I wanted it to be masculine. I did use heavy duty glue on the lid to hold it together. Enjoy. And go make one!


Sunday, October 27, 2013
Scrappy Sunday: Honeymoon page, Scrap Our Stash (project pinterest)
I finally began the daunting task of scrapping our honeymoon. I saw this layout on Pinterest and knew I HAD to use the sketch, even though I admit, I usually can't get past the pet pictures. I know, I'm weird, but for some reason I just don't get them, even though I love our dog.
ANYWAY, I love, love, love this layout. I was going to use it for the intro page of a honeymoon scrapbook, but once I started it, the papers didn't match and it all looked horrible together. So I pulled off a bunch of stuff, and instead used an old packet of Making Memories stuff that I've had forever. I decided to do the Scrap Our Stash Tic-Tac-Toe challenge with the sketch. I'm actually going to use the sketch again, as I had to rotate it a lot to make it work, and I want to do a page from it that's pretty much an exact copy.
Here's the result:
 I used the row on the left of the tic-tac-toe board and used 5 brads, some washi tape I'm in love with, and some journaling spots from the Making Memories pack. The cardstock, brads, and washi tape by Paper Studio, ink by Around the Block, everything else is Making Memories 5th Avenue 8x8 pack. I usually think my journaling is too personal, so I'll add that later.
ANYWAY, I love, love, love this layout. I was going to use it for the intro page of a honeymoon scrapbook, but once I started it, the papers didn't match and it all looked horrible together. So I pulled off a bunch of stuff, and instead used an old packet of Making Memories stuff that I've had forever. I decided to do the Scrap Our Stash Tic-Tac-Toe challenge with the sketch. I'm actually going to use the sketch again, as I had to rotate it a lot to make it work, and I want to do a page from it that's pretty much an exact copy.
Here's the result:

Sunday, September 29, 2013
Scrappy Sunday: Scrap Our Stash Challenge
Alright, here's another challenge from Scrap Our Stash. This was a sketch challenge, with the added condition to add chipboard to the layout. I also designed this for Outlaw Women's Scrapbook Emporium September challenge to use fall colors.
The Sketch Challenge.
The Color Challenge.
The Sketch.

My page:

The supplies:
Patterned paper, cardstock, craft cardstock from packaging, Sharpie, chipboard title and leaves by The Paper Studio, metal leaf brad
The Sketch Challenge.
The Color Challenge.
The Sketch.
My page:

The supplies:
Patterned paper, cardstock, craft cardstock from packaging, Sharpie, chipboard title and leaves by The Paper Studio, metal leaf brad
Sunday, September 22, 2013
Scrappy Sunday: Scrap our Stash #challenge (Project Pinterest) #sketch
Today I'm sharing a challenge I did for Scrap our Stash. It required a travel theme, an object of signage, and a pre-made vehicle embellishment. I wasn't feeling very creative, so I went to my Pinterest scrapping board to find a sketch. I found an old one from over at Ally Scraps blog. I stuck pretty close to the sketch, changing the page size and orientation of the photo but otherwise staying pretty true to it.

 For this challenge I used the American Traditional Designs travel kit I've had for probably 5 years. I use it pretty much every time I make a travel page, but somehow it never seems to run out. It was a big kit! So I used that for the paper.
I also used ink from We R Memory Keepers for ink edging, a car sticker, a Sharpie for journaling, Paper Studios brads, Making Memories letter stickers, and some printables I found over on Pinterest. The other big embellishment I used was the black rubber ring on the bottom right, which reminded me of a tire. I'm not sure what it is or what it's for. I found it on the side of the road while walking one day, and immediately knew I'd use it on a page as a tire one day. I finally found a good use for it!

I also used ink from We R Memory Keepers for ink edging, a car sticker, a Sharpie for journaling, Paper Studios brads, Making Memories letter stickers, and some printables I found over on Pinterest. The other big embellishment I used was the black rubber ring on the bottom right, which reminded me of a tire. I'm not sure what it is or what it's for. I found it on the side of the road while walking one day, and immediately knew I'd use it on a page as a tire one day. I finally found a good use for it!
Sunday, September 15, 2013
Scrappy Sunday bonus!
Okay, so I already posted today, but I have another quick project to squeeze in. This one is a project/challenge from over at my favorite blog, Pagemaps. I absolutely love, love, love the pagemaps on their site, and that they are free for all. Maybe my favorite site for inspiration.
I also love all the challenges they do over at the blog. Here is the sketch for the challenge this month.

And here is my take on it. I went pretty exact with this one. Did a little bit of torn paper instead of the straight lines, since I wanted to use the light blue horizontal stripe paper, and it was already in my scrap bin, torn. Instead of giving up on it, I used it torn. Then I ripped the edges of the top left square to make it match. My favorite thing about this page is the washers I used. These were all metal washers I found on the ground. I am always picking up things off the ground, and I have quite a collection of scuffed up/grungy/distressed washers I've found around town. So it was great to get to use some, of all different sizes. And they fit perfectly with the pictures of my dude in his hardhat, and helped give the page a masculine feel. I used scrap paper from my bag of scraps for everything on this layout except for the background paper. How great is that? I love it when I can get rid of some of those scraps. I also stapled a little bit of ribbon on there, trying not to get too overboard or girlie with it.

I also love all the challenges they do over at the blog. Here is the sketch for the challenge this month.

And here is my take on it. I went pretty exact with this one. Did a little bit of torn paper instead of the straight lines, since I wanted to use the light blue horizontal stripe paper, and it was already in my scrap bin, torn. Instead of giving up on it, I used it torn. Then I ripped the edges of the top left square to make it match. My favorite thing about this page is the washers I used. These were all metal washers I found on the ground. I am always picking up things off the ground, and I have quite a collection of scuffed up/grungy/distressed washers I've found around town. So it was great to get to use some, of all different sizes. And they fit perfectly with the pictures of my dude in his hardhat, and helped give the page a masculine feel. I used scrap paper from my bag of scraps for everything on this layout except for the background paper. How great is that? I love it when I can get rid of some of those scraps. I also stapled a little bit of ribbon on there, trying not to get too overboard or girlie with it.

The title sticker is from a 7 gypsies collection.
Background paper, Paper Studios.
Top right accent paper: KI memories
Spray ink: SEI
Bottom left paper: Colorbok
other: ribbon, staples, paper, washers, journaling block sticker
Scrappy Sunday: Fourth of July mini-album (Project Pinterest #8)
Hey, guys,

Here is something I've been working on for a while. I'm an incredibly slow scrapper, so this one took me several hours on several different days. But, I think it turned out okay. Not nearly as fabulous and vibrant as the original, but it served its purpose. The original can be seen here, but its all written in what appears to be German, so no instructions if you're an English speaker. But, the pictures were enough for me to do a good adaptation.
I accidentally did page 1 first, so that became my cover, and later on, I put the cover inside as one of the layouts. This is the front of the album. I used regular pattern paper, but if I was going to do it again, I would use cardstock for the covers at least. I used a file folder design for this. You can see all the tabs. I ran a strip of washi tape along the binding and between each page to hold it all together.
I used paper from Hot Off the Press (navy packet) throughout. The tape is Washi, spray ink by SEI, and my dymo label maker.
 Here's the first layout. I used a bookmark for an accent. Circle punch (Paper Studio), stamp and circle frame (Target dollar bin), acrylic paint (Making Memories), washi tape, index card, and sticker (colorbok).
 This layout has a photo mat, but I didn't put the pics in yet. It fits mostly 4x4 pics. Other supplies: Acrylic paint (Anita's, Making Memories), index card, label maker, sticker (DCWV), staples
 Other supplies: oval frame (part of navy kit), brad, stamps (stampabilities, autumn leaves), sticker (Colorbok), washi tape

Other supplies: USA sticker, chipboard star (paper studio), punch
 Light blue journaling block (Target dollar bin), stickers (Colorbok), chipboard (Paper Studio)
 Additional supplies: Memories Stamp (Hampton Arts)

Additional supplies: journaling spot, stickers (Target dollar bin)
I left some of the pages simple, and really decorated some of them. I left spots open for at least one photo on each page, as well as space for journaling strips, which I will print, cut out, and in after the photos are glued in.
This project was super fun to make. Messy, with all the spray ink and paint.
Happy creating, all!

Here is something I've been working on for a while. I'm an incredibly slow scrapper, so this one took me several hours on several different days. But, I think it turned out okay. Not nearly as fabulous and vibrant as the original, but it served its purpose. The original can be seen here, but its all written in what appears to be German, so no instructions if you're an English speaker. But, the pictures were enough for me to do a good adaptation.
I accidentally did page 1 first, so that became my cover, and later on, I put the cover inside as one of the layouts. This is the front of the album. I used regular pattern paper, but if I was going to do it again, I would use cardstock for the covers at least. I used a file folder design for this. You can see all the tabs. I ran a strip of washi tape along the binding and between each page to hold it all together.
I used paper from Hot Off the Press (navy packet) throughout. The tape is Washi, spray ink by SEI, and my dymo label maker.


Other supplies: USA sticker, chipboard star (paper studio), punch

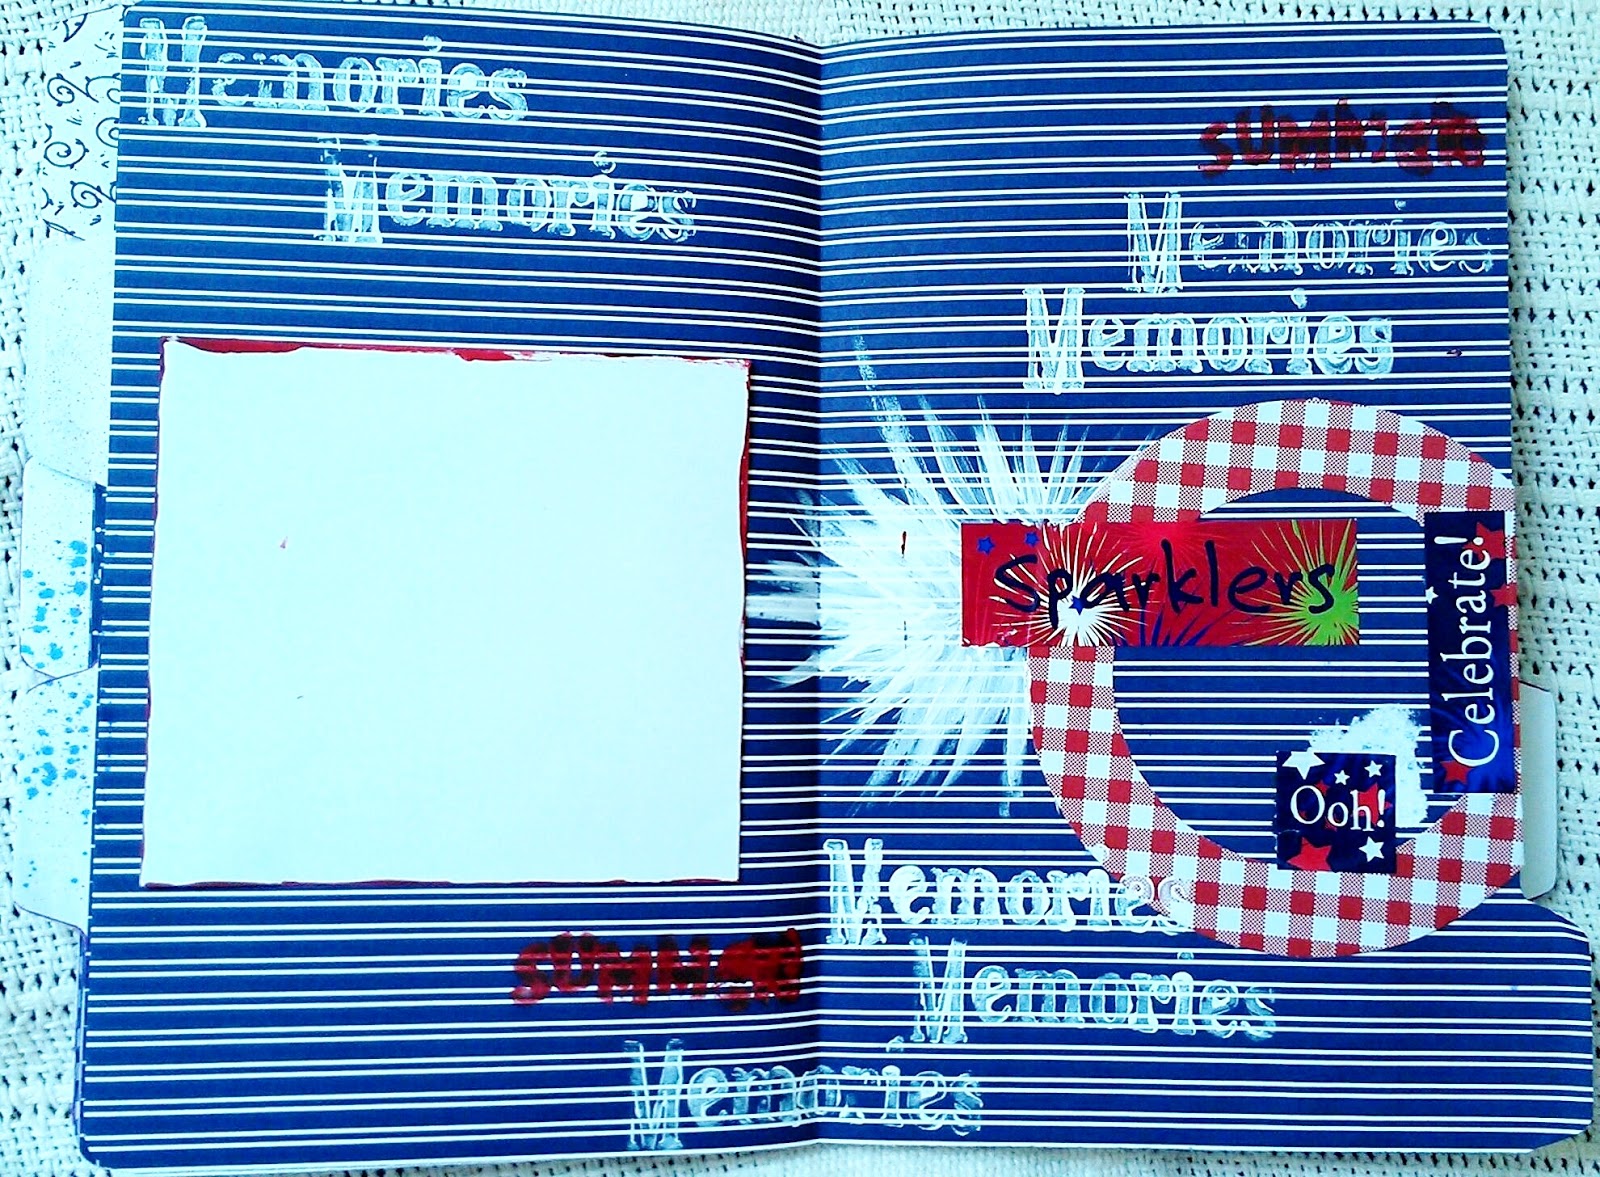

Additional supplies: journaling spot, stickers (Target dollar bin)
I left some of the pages simple, and really decorated some of them. I left spots open for at least one photo on each page, as well as space for journaling strips, which I will print, cut out, and in after the photos are glued in.
This project was super fun to make. Messy, with all the spray ink and paint.
Happy creating, all!
Sunday, August 18, 2013
Scrappy Sunday: Map picture frame (Pinterest Project #4)
Here is the very first project I ever made from Pinterest. It was so easy, how could I resist? Plus, I love maps. I love pictures. And I'd never decorated a picture frame before, though I'd always wanted to.
 I didn't go look up the website and follow directions or anything. I
just found a map I'd picked up on my travels to Florida, and used a
picture from the same trip. I used mod podge to glue and finish the
frame. I tore the map into pieces and kind of decoupaged them all
together. Then I used some sea shells I picked up on the beach on the
same trip to finish it out, and added a metal title and a ribbon.
I didn't go look up the website and follow directions or anything. I
just found a map I'd picked up on my travels to Florida, and used a
picture from the same trip. I used mod podge to glue and finish the
frame. I tore the map into pieces and kind of decoupaged them all
together. Then I used some sea shells I picked up on the beach on the
same trip to finish it out, and added a metal title and a ribbon.

Wednesday, July 17, 2013
#scrapbooking Pagemaps challenge: Sun and Sand
Another pagemaps challenge this week. I am still scrapbooking my Florida trip from a year and a half ago. I did take a year long scrapping break in there, but it's just about impossible for me to scrap trips because I take literally hundreds of pictures. But I'm doing my best.
 This week, I followed the Pagemaps sketch and tried to do a layout pretty close to the sketch for their contest. Here is the sketch, and my take on it.
If you are looking for some great sketches, check out the pagemaps website. They run contests on their blog all the time, too. Usually a ton of people enter, but it's good motivation to get a page done. Head over there to enter the contest, or check out their website for tons and tons of free sketches.

For this page, I used the following supplies:
Pattern paper-DCWV and Target
Pen: Zig
Stickers: Miss Elizabeth's (Blue shell), ATD (Title), Making Memories (words), Jolee's (pink glitter shell), other (quote bubble, fish)
 This week, I followed the Pagemaps sketch and tried to do a layout pretty close to the sketch for their contest. Here is the sketch, and my take on it.
If you are looking for some great sketches, check out the pagemaps website. They run contests on their blog all the time, too. Usually a ton of people enter, but it's good motivation to get a page done. Head over there to enter the contest, or check out their website for tons and tons of free sketches.

For this page, I used the following supplies:
Pattern paper-DCWV and Target
Pen: Zig
Stickers: Miss Elizabeth's (Blue shell), ATD (Title), Making Memories (words), Jolee's (pink glitter shell), other (quote bubble, fish)
Thursday, July 11, 2013
Scrappy Sunday? A few days early
Okay, I know I've been terrible about blogging, and really, I haven't had much time for the creative life lately. But, I did manage to do a few scrapbook pages while house sitting last week. Here is one I did for the contest over at one of my favorite sites, Pagemaps.com. I love using their sketches. Here is the one for this contest.


And here is my take on it. I used mostly the same product line for everything, ATD. There are a few exceptions, of course. Love, elsie did the embossed pine green paper, which I love. And the film canisters are from a photo-realistic pack I had. I didn't have many supplies, so I actually have to add a few extras, some brads and ribbon at least. But here's what I could do while not at home. I don't like exposed journaling, so it's tucked away in the envelope to the left of the campfire pic. I wrote on the three tags peeking out.


And here is my take on it. I used mostly the same product line for everything, ATD. There are a few exceptions, of course. Love, elsie did the embossed pine green paper, which I love. And the film canisters are from a photo-realistic pack I had. I didn't have many supplies, so I actually have to add a few extras, some brads and ribbon at least. But here's what I could do while not at home. I don't like exposed journaling, so it's tucked away in the envelope to the left of the campfire pic. I wrote on the three tags peeking out.
Subscribe to:
Posts (Atom)