Showing posts with label breakfast. Show all posts

Friday, August 29, 2014

Disaster Chef: Cinnamon Roll Pancakes

When I found this recipe on Recipe Girl a few months ago, I knew I wanted to make it even though it is soooo not healthy. But sometimes, you just gotta indulge. In this instance, my son asked me to make them, and I told him I'd make them for his birthday. Of course I then forgot all about it. But he didn't. On his birthday morning, he reminded me, so I put them together. They do take a loooong time, since they have 3 different components. I wouldn't just whip these up any day, since they took hours to make. But for special occasions, yes. My son already asked me to make them again for his next birthday. Knowing him, he'll remember, too.
Without the frosting.
For these, you have to make the cinnamon swirl, the pancakes, and the frosting.

First, I made the cinnamon swirl.
4 tablespoons (1/2 stick) butter,  melted
1/4 cup + 2 tablespoons packed light brown sugar
1/2 tablespoon ground cinnamon
Mix ingredients and pour into a ziplock sandwich bag. Set aside.
Next, I made the frosting. I'm not sure why mine turned out so dark, maybe the vanilla I used was too dark? I used pretty much exactly what the recipe specified, but mine was sort of caramel colored instead of a nice pearly white like the original recipe:
4 tablespoons (1/2 stick) butter
2-ounces cream cheese, at room temperature
3/4 cup powdered sugar
1/2 teaspoon vanilla extract
Melt the butter, then stir other ingredients into pan, mixing well after each addition.
On with the pancakes. Mix together
1 cup all-purpose flour
2 teaspoons baking powder
1 cup milk
1 large egg, lightly beaten
Mix together flour and baking powder, then other ingredients, mixing until moistened but still a bit lumpy.

Pour about 1/4 c. batter for each pancake into a skillet and let cook a couple minutes before cutting corner out of sandwich bag and drawing the circle on the pancake.You might have to squish the baggie a bit if the cinnamon mixture has separated. It should be toothpaste consistency as it squeezes out of bag.
Once turned, the cinnamon swirl melts into the pan, leaving a crispy, sugary, hollowed out swirl pattern in the pancake.
Turn it out onto a plate with the swirl side up. Drizzle with frosting to finish. They don't need anything extra--no butter or syrup.

As I said, these were sinfully delicious. I never use white flour exclusively, but I really wanted these to taste like cinnamon rolls, so I did this time. They were very decadent and delicious, very sweet and rich. I would make them again for special occasions, but not for an ordinary day. They are an indulgence for sure.


Friday, August 1, 2014

Disaster Chef: Buckwheat Noodles with Honey Lime Sauce

Finished product.
I was looking for a good recipe to make with buckwheat noodles, which I LOOOOVE, so I grabbed one off pinterest. I like more veggies in my meals so I used a whole carrot. I then discovered I didn't have any green onions, so I used about 1/4 of a regular onion and fried it (along with the grated carrots, since I don't really like raw carrots much).

I followed the dressing recipe from Joylicious blog  closely, though!

Ingredients
  • Handful of buckwheat soba noodles (the ones I get come in handy serving-sized portions)
  • 1/2 lime, squeezed (I didn't have a fresh lime, so I used about 2tbs. lime juice from a bottle)
  • 1 tablespoon soy sauce
  • 2 teaspoons honey
  • 2 teaspoons sesame oil
  • 1/2 carrot, shredded (I grated one whole carrot and sauteed it...the next time I made it, I also added a couple sliced mushrooms and some shredded cabbage and sauteed everything...it was delicious!)
  • 1 tablespoon toasted sesame seeds (I didn't have these so I left them out)
  • small handful of cilantro, cleaned and chopped
  • 1 tip of a green onion, cleaned and chopped (I used 1/4 of regular onion, sauteed)
  • 1 teaspoon oil
  • 2 eggs
The sauce mix.
Instructions
  1. In a medium pot fill with water and bring to boil. Drop noodles in and cook for 4 minutes at medium heat at a gentle boil.
  2. Rinse carrots and herbs and pat dry. Shred carrot and set aside. Finely chop cilantro and green onion and mix with shredded carrots (and if you're me, saute them now).
  3. Test to see if noodles are semi firm, if so turn heat off immediately. Allow pasta to further cook in the hot water for an additional 2 minutes. Meanwhile prepare the dressing.
  4. In a bowl combine lime juice, soy sauce, honey, sesame oil and sesame seeds. Whisk well and set aside.
  5. Test noodles for preferred firmness/softness and strain. Return noodles to pot and mix in carrots, herbs and dressing.
  6. In a medium pan, heat oil over medium high heat. Crack egg(s) carefully into pan and fry until edges are browned and whites are set (sunny side up). Flip over and cook for about 1 minute for over easy, ~ 2 minutes for over medium, ~3 minutes for over hard. (I did all this in the same pan, just pushing the veggies to the sides and frying the eggs in the middle, then tossing it all on top of the noodles and sauce, and mixing it as I ate to get some sauce on the veggies).
  7. To serve: Place noodles in a bowl and top with fried eggs. Feel free to add a dash of chile powder or chile sauce for an extra punch!

This recipe is wonderful, because it is so versatile and easy! I've made it three times, changing it every time. Sometimes I add extra veggies, sometimes I use only one egg, sometimes I add chili powder or cayenne on top. It's one of my favorite Pinterest recipes, and I think it's the only one I've gotten around to more than once. I love buckwheat noodles, and I've made this three times in the last month. I think I'll just add whatever veggies I have on hand, keeping the noodles, dressing and cilantro the same every time.

Recipe:  5 spoons of easiness
Outcome: 5 spoons of deliciousnsess

Friday, July 25, 2014

Disaster Chef: Peanut Butter Baked Oatmeal


My son is a picky eater, so sometimes dinner is a bit of a battle as it seems he never gets anything he likes. Once in a while, I like to let him choose dinner. Usually he’ll ask for a grilled cheese sandwich or something. But after trying baked oatmeal at my sister’s house, he’s really wanted me to make it. So, I looked up baked oatmeal on Pinterest and found about a billion recipes. He chose peanut butter baked oatmeal, and even though it’s summer and I encouraged the more summery blueberry baked oatmeal, he wanted the pb version, so that’s what I made.

Here is the recipe, off the fabulous Tidy Mom.


  • 1-1/2 cups quick cooking oats (I used regular and increased cooking time to 30 mins)
  • 1/4 cup packed brown sugar (here I used 1tbs black strap molasses)
  • 1/4 cup white sugar (I used xylitol instead)
  • 3/4 cup milk (whole milk)
  • 1/4 cup melted butter
  • 1 egg (I used 2)
  • 1 tsp baking powder (I used 1/4 tsp baking soda here)
  • 3/4 tsp salt (and left this out)
  • 1 tsp vanilla
  • 1/2 cup Skippy® Peanut Butter (I used East Wind organic)
Instructions
  1. Preheat oven to 350° and grease a 9×13 pan. Mix all ingredients together in a large bowl and stir well. Spread in to pan and bake for 20-25 minutes (I used 30 mins for regular rolled oats) or until edges are golden brown. Serve with warm milk poured over top (I used cold milk and sliced bananas, like Tidy Mom suggests).

As you can see, I altered nearly everything in this recipe. It wasn’t very sweet when it came out, and my son complained about it, but he ate up a whole big bowl full. If I was making it for breakfast, I wouldn’t want it to be super sweet anyway, and with bananas and milk, it was just sweet enough. I also added an extra egg, since we have our own and I like to use them whenever I can. I don’t use baking powder, so I used ¼ tsp. baking soda instead. And I left out the salt, since I’m very sensitive to the taste of salt in baked goods.


The outcome was pretty tasty, but I don’t know if I’ll make it again, and not in the summer, for sure. It’s heavy and wintery with the peanut butter. I might try the blueberry one this summer, though. It was super easy and only required one bowl and one pan.

Recipe: 3 out of 4 spoons.
Product: 3 out of 4 spoons.

Friday, January 31, 2014

Disaster Chef: Pear Pecan Steel Cut Oats (project pinterest)


I bought a bunch of steel cut oats a while back because I heard they were healthier than rolled oats. I didn't know how to cook them, so I did the overnight oatmeal with the first batch. It was okay, but my son did not like the 'chewy oatmeal.' So I ended up eating all 5 jars that I'd made for the week. The next time, I tried to cook it, but didn't leave it in nearly long enough and it was very chewy.

This time I made it the right way, cooking it for a long time with lots of water as directed in the article on two vrooms blog.
Here's their recipe:

1/4 tsp salt
1 c. steel cut oats
1 T + 1 tsp butter
1/2 c. pecans
2 tsp sugar
2 pears (peeled, cored, sliced into chunks). If you don't have or don't like pears, try this recipe with apples instead.
3 T honey
1/4 tsp cinnamon
Half and half

In a medium size sauce pan, boil 4 c. water and salt. Add steel cut oats and wait for it to boil again. Turn the heat down to medium-low. Simmer (uncovered) for 25-35 minutes, stirring often.

In a frying pan, melt 1 tsp butter. Add pecans and sugar. Stir 1 minute: the sugar should melt and coat the toasty pecans. Move them to a cutting board and chop coarsely when cooled.

Right before your oatmeal is done, melt a tablespoon of butter in the frying pan again. Add the pears and stir occasionally for 3 minutes. The juice should come out of them and they should be hot all the way through. Add honey and cinnamon.


It turned out delicious. My son even ate it a couple days, though he still prefers rolled oats. For this recipe, I used pears from the tree outside our new house, which was exciting. I'm not a big fan of pears, but I wanted to find ways to use up the ones on the tree, since they were there and obviously all-natural and organic and not sprayed. So we collected a bucket of them and used some in this recipe. I made it later for my husband, and he liked it, too.

I did not prepare the pecans as directed in the recipe. I just used plain pecans. I added more honey to the pears than the recipe calls for, and more butter, and I cooked the pears for probably 15-20 minutes before they got juicy and somewhat cooked. I didn't want to cook the pecans, as I don't like the way sugar-coated things feel between my teeth. Plus, raw nuts are healthier. So I just threw a handful of raw pecans on top. This breakfast was great all week, healthy and tasty. Sure, it's still just oatmeal. But it was as exciting as oatmeal gets
.

Friday, January 17, 2014

Disaster Chef: Baked French Toast (Project Pinterest)


This was a recipe I tried out during Christmas break when my family was here. My son isn't the biggest fan of French toast because he says it's too soggy, but he loved this. The recipe can be found here, on Parade.

Here's the recipe:


Ingredients

  • 1 (12½ oz) loaf of favorite bread (such as challah), cut into 1-inch-thick slices
  • 3 cup whole milk
  • 7 large eggs
  • ½ cup light-brown sugar
  • ¼ cup real maple syrup, plus more for serving
  • 2 tsp pure vanilla extract
  • 2 tsp cinnamon
  • ¼ tsp nutmeg

Directions

  1. Generously butter a 13 x 9–inch casserole. Arrange bread slices in dish, staggering in rows.
  2. In large bowl, beat together milk, eggs, brown sugar, maple syrup, vanilla, cinnamon, and nutmeg. Pour over bread and press down, making sure slices absorb liquid. Cover with foil.
  3. Refrigerate overnight.
  4. Preheat oven to 350°F. Remove foil and bake casserole 55 minutes to 1 hour, until puffy and golden. Serve with more maple syrup, if desired. 


I used whole wheat bread and spread it out on two dishes because when I layered the bread, it wasn't under the milk. We only had 2 cups of milk, so I used that and a half cup of half & half. Our chickens definitely don't lay large eggs, so ours were small. I used only 2 tbsp. of sugar and syrup, and 1 tbsp. of cinnamon and 1/2 tsp nutmeg. I baked until the bread got puffy and took it out. It got nice and crisp on top, and everyone liked it, even my son, since it was not at all soggy.

Friday, January 10, 2014

Disaster Chef: Pumpkin Pancakes (Project Pinterest)

So, maybe the first or second thing I ever made off Pinterest was pumpkin pancakes. But apparently I didn't pin the recipe! So this past fall, when we had tons of pumpkins from the garden, I went looking for the recipe I made the year before. Of course I didn't remember it/couldn't find it. But there were about a million pumpkin pancake recipes, so I picked one and rolled with it. This time I made sure to pin it, since my son really likes pumpkin pancakes.

I followed the recipe from table io pretty closely.

Ingredients
    Wet Ingredients:
  • 1 1/2 cups milk
  • 1 cup pumpkin puree
  • 1 egg
  • 2 tbsp vegetable oil (I skipped this)
  • 2 tbsp apple cider vinegar

  • Dry Ingredients:
  • 2 cups all-purpose flour
  • 1/4 cup brown sugar
  • 2 tsp baking powder (left this out)
  • 1 tsp baking soda
  • 2 tsp pumpkin spice
  • 1/4 tsp ground cloves
  • 1/2 teaspoon salt (left this out)
Instructions
  1. In the bowl of a stand mixer, add the wet ingredients and mix using the flat beater attachment. In a separate bowl, stir together the dry ingredients with a spoon or whisk. Pour the dry ingredients into the wet ingredients and stir until just combined.
  2. Heat a griddle or skillet over medium heat. Spray lightly with cooking spray and add about 1/4 cup pancake batter. Cook the first side until lightly brown and the edges begin to set. Flip the pancake over and cook until browned. Place a clean kitchen towel over the cooked pancakes as you prepare the rest.

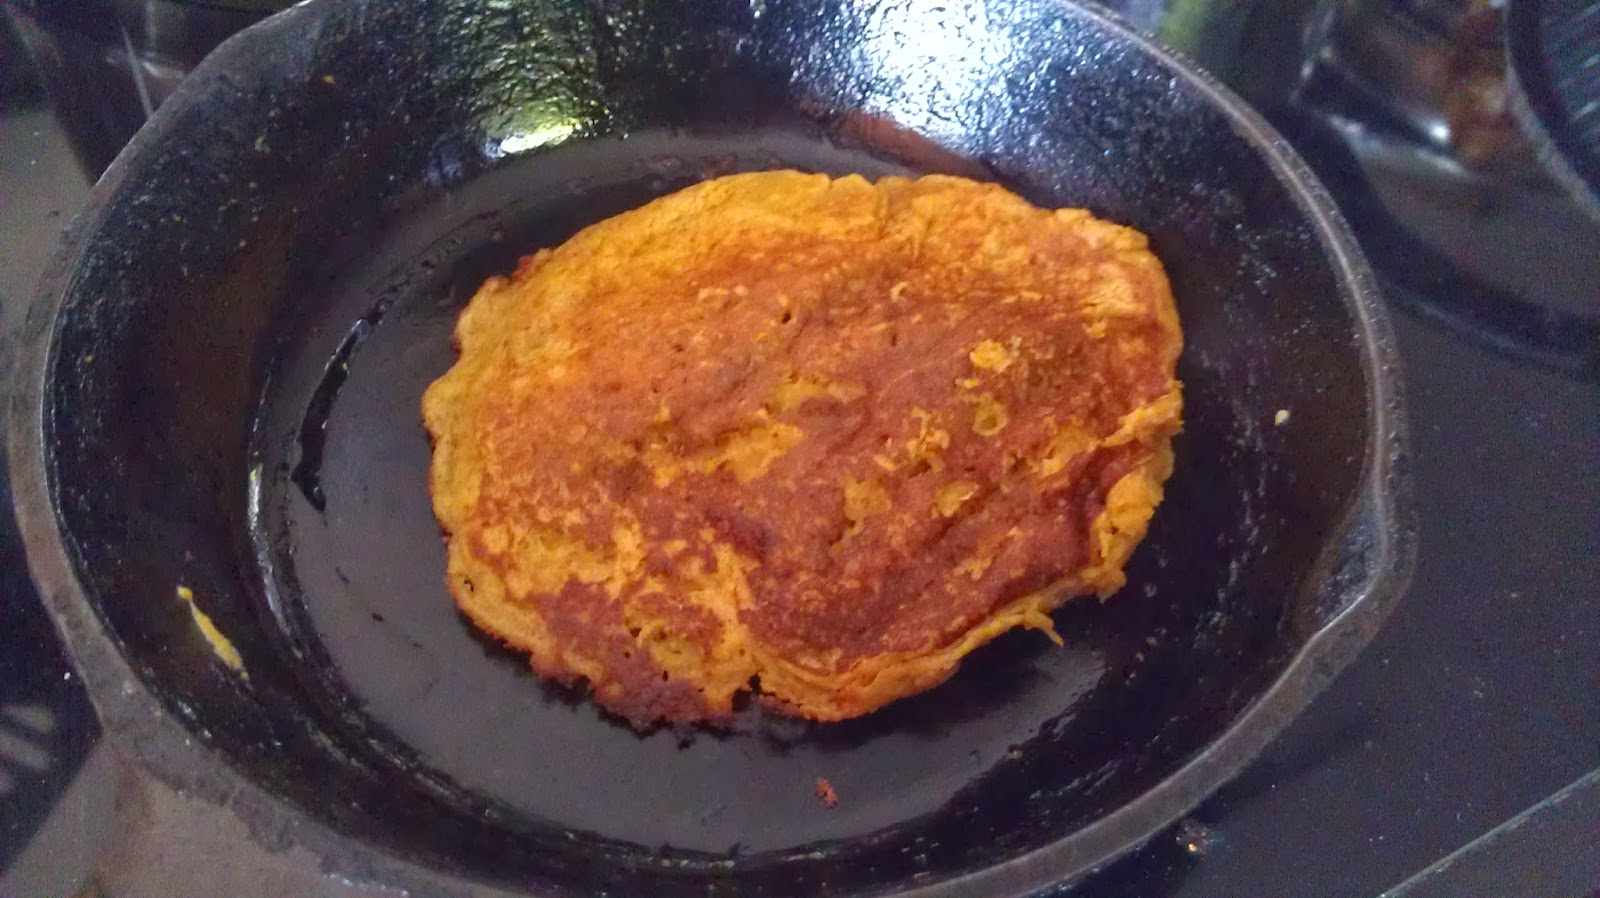
I mixed all of it by hand and the batter was super thick. The kind of thick where the pancake doesn't cook in the center. And nothing is more yucky than raw pancakes batter in the center of an otherwise delicious pancake. So I added more milk to thin the batter. But then they got all weird and foamy like my snickerdoodle pancakes. At least these ones didn't taste all weird and sour! I added more flour to thicken them up, and then spread the pancakes very thin. The batter doesn't flow out nicely, so I had to spread each one in the pan, but once I did that, they cooked all the way through and were tasty enough for my son.

Pancake success.

Rating: Recipe 3.5 out of 5 spoons, after I figured out how to cook them.

Needed better instructions on spreading doughy batter. Wasted a few pancakes before I got it right.

Friday, October 25, 2013

Disaster Chef: Snickerdoodle Pancakes #foodiefriday #projectpinterest


Another disastrous Disaster Chef project here for you today. This week it’s snickerdoodle pancakes. Remember my post about making snickerdoodles, and how I didn’t have any cream of tartar? Well, I got some. And I made snickerdoodles again, and they were everything a snickerdoodle should be. I was so inspired, in fact, that the next morning I decided I’d make snickerdoodle pancakes, which I’d seen on pinterest while searching for the cookie recipe.

First let me say, pancakes can be tricky. I did my fair share of burning them when I started making them a few years ago, and had a number turn out with raw centers. But my son LOVES pancakes, so I got better at them. In fact, now it’s one of the few things I consistently rock. I make all varieties—apple, pumpkin, banana, blueberry, plain…And my son loves them all. Because, let’s face it, I’ve become a pancake expert.

I was just cooking for my son and me this time, so I halved the recipe. It can be found here.

Think this looks moist and soggy? It's worse!
Snickerdoodle Pancakes
Author: 
Recipe type: Breakfast
Cuisine: American
Prep time: 
Cook time: 
Total time: 
Serves: 4
Snickerdoodle Pancakes!
Ingredients
  • 1 cup of all-purpose flour
  • 3 tablespoons of sugar
  • 2 teaspoons of cream of tartar
  • ½ teaspoon baking soda
  • ½ teaspoon of kosher salt
  • 2 teaspoons of cinnamon
  • ¼ teaspoon of freshly grated nutmeg
  • 1 cup of sour cream
  • 4 tablespoons of melted butter
  • 1 egg, lightly beaten
  • ¼ – ½ a cup of milk
Instructions
  1. Combine dry ingredients in large bowl and whisk to combine.
  2. Add wet ingredients and whisk just until combined.
  3. Use ¼ cup of milk for thicker, fluffy pancakes. Add more milk for thinner, tender pancakes.
  4. Pour ¼ cup of pancake batter onto hot non-stick griddle.
  5. When edges of pancakes start to set, flip and cook until light golden brown.
  6. Serve with butter and warm cinnamon vanilla glaze.
  7. Makes about 16 pancakes.

I don’t know if it was the cream of tartar (it seemed like it called for an awful lot), but the batter was this really weird gelatinous consistency. I did use plain yogurt in place of sour cream, since I didn’t have a container of sour cream on hand. But I’ve used this substitution lots of times, and it’s always worked fine. In fact, I always use yogurt in pancakes, because it gives them a wonderful tender quality. This time, not so much.
   
Waiting, and waiting, for this to solidify...
I put the first pancake in with high hopes. Then I proceeded to wait, and wait, and wait for it to get solid around the edges. Finally, it looked sort of solid so I tried to slide a spatula under it, but it sort of folded up. I did manage to get it turned, then waited a few minutes and took it off. It had taken a long time to solidify around the edges, so that side was a little overcooked. Fine, it was a bit burned. But still edible. I decided to eat that one myself and make a better one for my son. As I browned his pancake to perfection (see picture), I ate the one I’d made. IT WAS TERRIBLE! It was super sour for some reason, and even though it was scorched on one side, the middle was all gooey. Not raw, mind you. More like…foamy pudding. Or that whipped yogurt Yoplait put out a few years ago.
The one that looked good.

These things would not cook! Even though the second one looked beautiful, it was all gooey in the middle too. I tried adding more liquid, then more flour, then turning the pan on the lowest setting, which couldn’t burn anything if you left it all day. I left a pancake in there on low for about 20 minutes, even putting a lid on it so the top would cook, even if it turned out cake-like. No. It NEVER cooked. It just solidified the gelatinous goo.

This was a huge disaster, unless you like really gooey, gummy, sour pancakes. I will never make it again.

The cinnamon glaze was good, though.
Warm Cinnamon Vanilla Glaze
Author: 
Recipe type: Glaze
Cuisine: American
Prep time: 
Cook time: 
Total time: 
Serves: 4
A warm cinnamon vanilla glaze to serve on top of Snickerdoodle Pancakes.
Ingredients
  • 1 cup of powdered sugar
  • 1 teaspoon of pure vanilla extract
  • 1 teaspoon of cinnamon
  • 3-4 tablespoons of milk

Instructions
  1. Whisk all ingredients together in a small bowl. Warm in small pan over low heat.